I while back I made a spray paint "booth" it was pretty much just cardboard boxes arranged to block the wind. Even though I was pretty impressed with my set up, there were several gaps in the booth and I ended up with bright teal spray paint on the patio.
This was not ok and I was really worried about our deposit. So I googled how to remove spray paint from cement. After reading about sand blasting over and over I finally found one that said to use oven cleaning spray. At first I thought yah right, but I really didn't want to have a rent a sand blaster either. So I gave it shot.
What do you know it works! GREAT! Spray it on let it set for 30 min or so (I lost track of time so I can't really say how long it was there) then give it a little scrub and spray clean, it is amazing.

Tuesday, January 29, 2013
Monday, January 28, 2013
Happy Monday!
This project has been a long time in the making, as you can this is a Christmas tree and it is nearly FEBRUARY! I got a wood burner for Christmas and I needed some wood pieces to burn

So with some help from my hubby the tree turned into this

and then this!!!!!!

This project defiantly wont be finished this week since the wood will have to dry, but as soon as the wood is ready this project in on!
Thursday, January 24, 2013
Finished Thursday: Wine Bottles!
I'm so excited I finally have some finished projects! It took a lot of trial and error, but I finally have a few things I really like.
Wine bottle lanterns

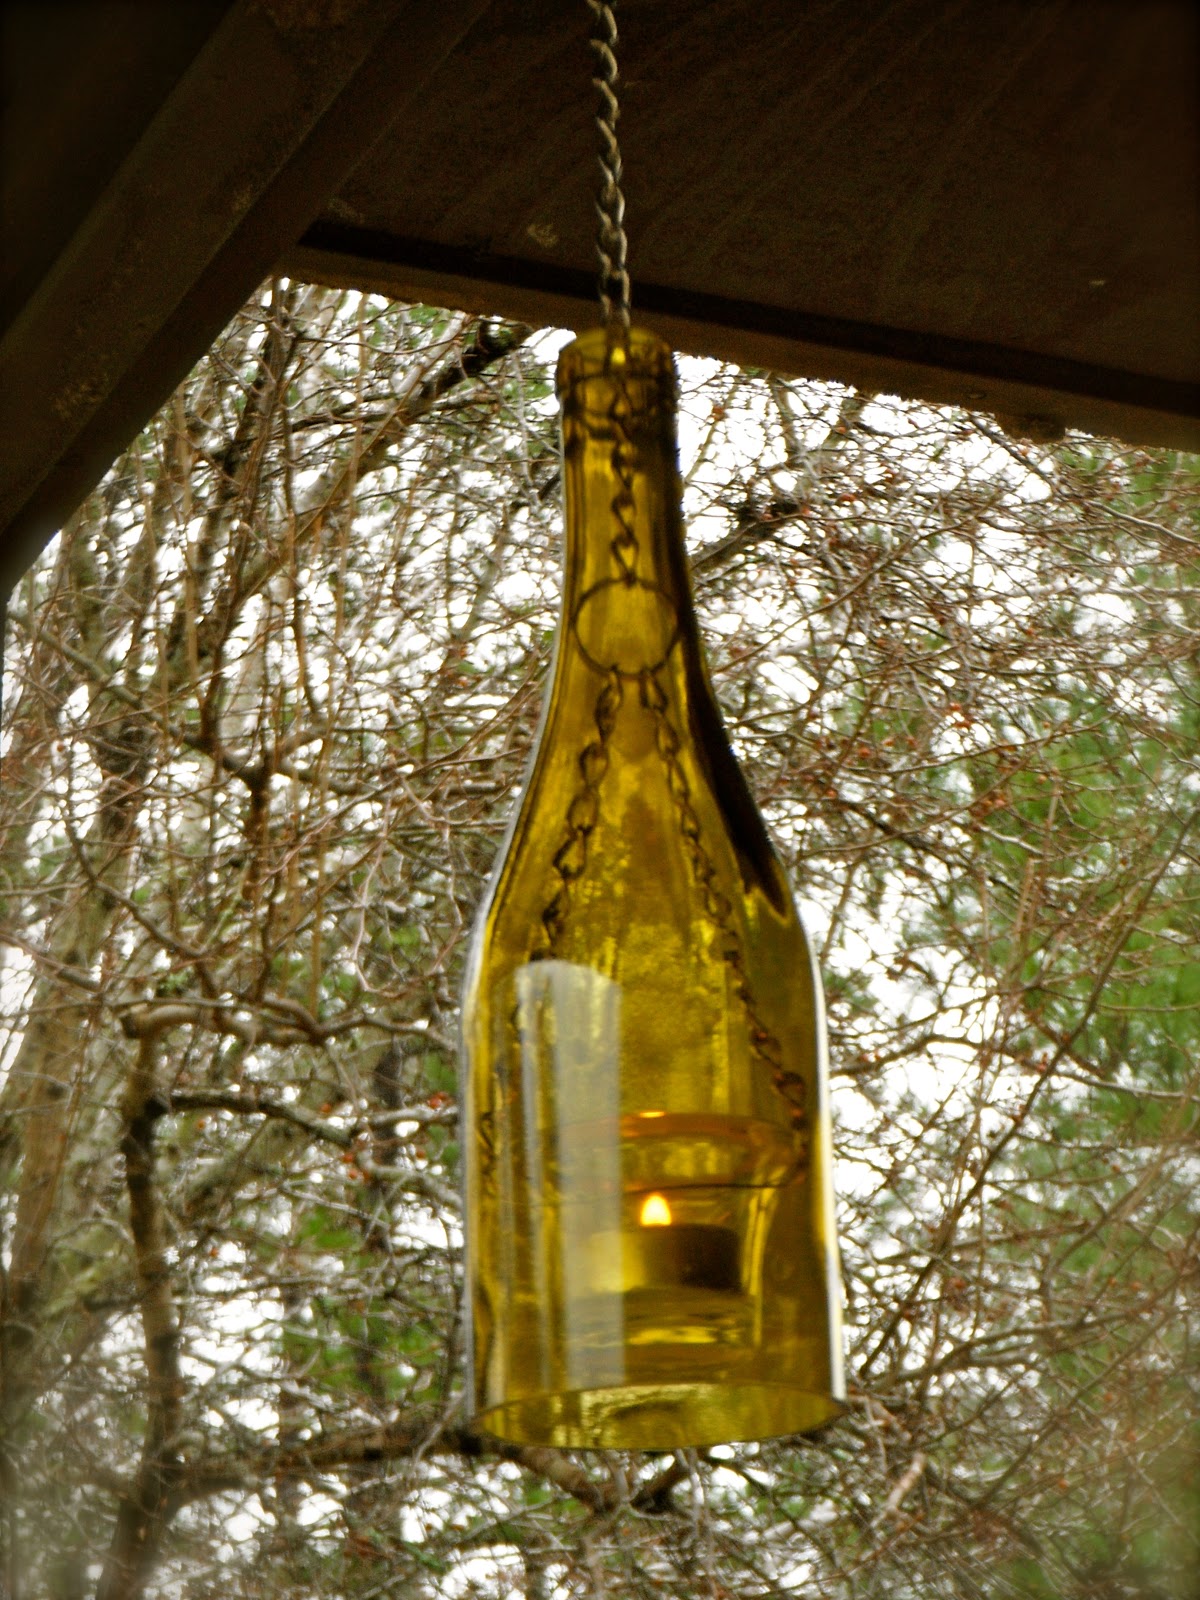

I found this idea on pinterst idea credit here.
Candlestick holders!


Now I just need some more bottles!
Wednesday, January 23, 2013
Pinspired Goodies
I know the soap bottle mason jar has been all over Pinterst so this is nothing new, but I finally made one! Yippee
(with flash)

(without flash)

Tuesday, January 22, 2013
The Facts of Sara
After reading several posts of the Facts About me Link Up hosted by I Wore Yoga Pants to Work

Monday, January 21, 2013
New Project Monday: I'm the Proud Owner of a Bottle Cutter!
This Christmas I had one thing on my list, a bottle cutter. Well I didn't one but I did get a gift card so I promptly ordered myself one. and this week I am finally going to start my bottle projects!
The first step is to collect bottles

The next is to remove the labels

Then begin the cutting process

I really want to make candles with the bottoms, but that's a whole new project that requires some supply research and shopping so I'm gonna put that project on hold for now. This week my goal is to make a set of candle holders and a set of lanterns, hopefully I don't destroy too many bottles in the precess. Stay tuned for the results!
Sunday, January 20, 2013
The GFC Collective Link Up!
Hi everyone I'm participating in this great link up, check it out there are tons of great blogs to read!

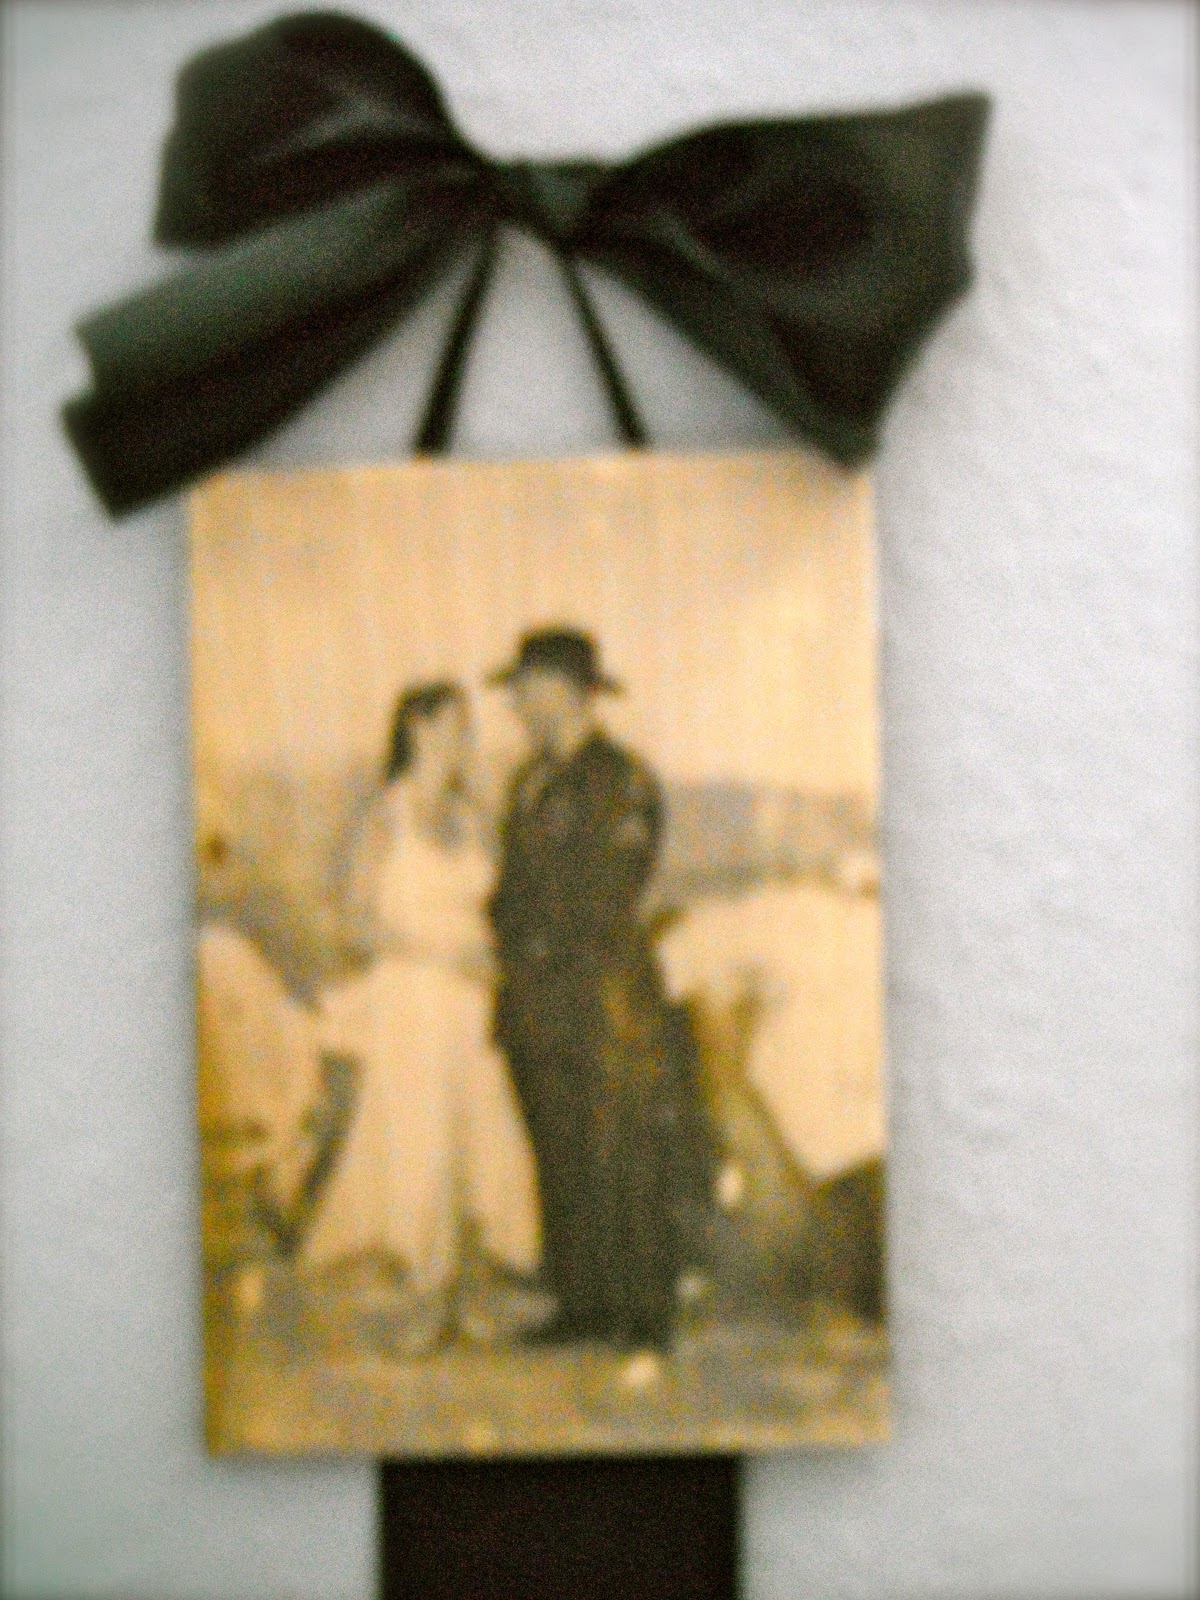
3 Panel Antique Family Picture
I finally have this project completed and ready to share! I started it awhile back when I saw this idea on Pintrest...
Later I found another idea that had 3 pictures connected together, so I decided to add our cat and dog to the picture I had previously made of me and the hubs. I used the same ribbon I used for the bow to connect the three panels together. I like how it came out, and I have the perfect place for it in our next house.


Friday, January 18, 2013
My Latest Upcycle
I don't know about you all, but where I live there are tons of yard sales, and since we all know we never sell everything at a yard sale there are also tons of curb alerts. If you haven't experienced a curb alert it's when someone puts their yard sale left over out on the side walk with a free sign. Since I love to upcycle, naturally I love curb alerts! Some of my favorite things to get are picture frames (there are so many cute ideas for painting and decorating frames so what if it has a scratch or two I'm gonna paint it anyway), and silverware (I make Christmas ornaments out of spoons). Well at one such curb alert I got a plastic tub. The lid had a crack like something too heavy was dropped on it, but it was still in one piece and otherwise perfectly good. It's pretty much the perfect dog food container. So I decided to take some scrapbook paper and mod podge and add a "decorative stripe" that also served to stabilize and seal the crack. Now it really is the perfect dog food container :-)


I'm a Winner!
This week I entered the Etsy Galore Giveaway that was put on by Mostly Happenstance (check out there blog here, it's really awesome...http://www.mostlyhappenstance.com).

Here's a link to posting :-)
I love Etsy and I love blogging so I gave it shot not thinking I had any chance of winning, but look at all of these awesome items how could I not give it a try?! I mean just look at these wonderful items.

Well this morning I woke up to this email!
Hi Sara,
Congratulations!!! I just wanted to let you know that you have won Column 1 from the Etsy Galore Giveaway! Woo-hoo!!
Please respond to this email within 24 hours in order to claim your prizes. I will provide more details then :)
I look forward to hearing from you!
I can't believe I was one of the 3 winners! I am sooooooo excited!
Thursday, January 17, 2013
Quick Crafts: Upcycled Pill Bottle
Who doesn't love a cute and useful craft you can do in 5 min or less!?!
Here's one I made today, an Upcycled Pill Bottle :-)
(I saw this project somewhere, most likely Pinterst, and I can't for the life of me find it again, so if this was your idea message me and I'll add the link)
1. Wash an empty pill bottle with soap and water (I like this white one from the drug store better then the orange ones from the pharmacy), I removed the label, but I am sure it will work just as well leaving it on there.
2. Measure the height of the bottle where you want the paper to cover, and the diameter.
3. Cut a strip of paper that size (I chose a paper I liked out of my scrap folder).
4. Mod Podge it on there.
5. Use when dry! (I am sure there are tons of little things that could be organized in cute little bottles, and the best part is it's still child proof!
I also think I will add a label of some sort once I decide what I am going to put into it :-)

ENJOY!
~Sara
Finished Thursday: Body Wash
Well my soap project didn't go as well as I had hoped, it's my fault really I got to cooking away and wasn't paying attention to the directions as well as I should have. The direction called for a gallon of water and just started with that instead of slowly adding it until I got a consistency that I liked. My soap ended up much more watery then I would have liked even after waiting 24 hours and then blending it. Maybe I didn't blend it long enough, but the directions didn't say how long to bend it for. My soap is usable but I am considering blending it again, or even starting another batch but instead of adding water using this mixture for the liquid. That may be too much soap though. This mixture is very soapy and cleans very well. I plan on making another batch my husband out of his favorite and when I do that I will be careful with how much water I add.
This week has been a long week, lots of hours at work, and I have been sick, none the less I have great new projects for next week!
This week has been a long week, lots of hours at work, and I have been sick, none the less I have great new projects for next week!
Tuesday, January 15, 2013
New Project Monday (On a Tuesday)
Ahhh a whole day late! Our internet is was down yesterday, at some point it was fixed but I ended up working OT at work last night and have no idea what time that was. But on to this weeks post :-)
The great body wash experiment...
Since last weeks laundry soap experiment worked so well I thought I would give body wash a shop. Ideally I would like to use a bar of organic soap but I can't get it in the small town where I live so I giving it a shot with a regular bar of soap. Here is the link to the recipe...
Once again my trusty pot and cheese greater, plus soap and glycerin.

Thursday, January 10, 2013
Finished Project Thursday: Laundry Soap
After doing quite a few loads of laundry this week (it never ends around here) I have discovered that this homemade laundry soap works really well, not only that but I think it makes my clothes smell better then the store bought stuff! I used my husbands favorite bar soap hoping to make the transition as smooth as possible. The best part, he didn't even notice :-)
The next step is to make it a more natural by using an organic bar of soap, but that will a ways down the road since this made a pretty big batch. Right now I am happy that it worked!
Next week I am going to tackle body wash!
The next step is to make it a more natural by using an organic bar of soap, but that will a ways down the road since this made a pretty big batch. Right now I am happy that it worked!
Next week I am going to tackle body wash!
Monday, January 7, 2013
New Project Monday! DIY Laundry Soap
I don't have a craft project to work on this week, but I do have a cleaning project!
One of my New Years resolutions was to use products that are natural and better for the environment, this was going to be a gradual transition for a couple of reasons one I didn't want to freak out my husband, and two I didn't want to just toss out the products we already had. This week we ran out of laundry soap so I decided I would give that a try. I found this receipt on Pinterest
and today I am giving it a try.

After the soap is made I will do some wash and see how it turn out!
The Votes Are In
For the New Years Organization Challenge
I finished 61/150 with 2 votes, however 2 votes started 56
I happy I got 2 votes, and I have 2 new followers on my blog yay!
So far January is looking good :-)
I finished 61/150 with 2 votes, however 2 votes started 56
I happy I got 2 votes, and I have 2 new followers on my blog yay!
So far January is looking good :-)
Thursday, January 3, 2013
Finished Project Thursday!
This former cookie tin is painted and ready to find a new home!

Teal and black measuring 7 inches in diameter x 2 inches deep

These square jar have been frosted with 2 clear strips on each jar and embellished with green raffia, the top picture is taken with a flash the bottom picture is with no flash.


Tuesday, January 1, 2013
13 Resolutions Link Up
Happy 2013!
I have been thinking about New Years resolutions for several weeks now, but have yet to really organize my thoughts or write anything down. Then I saw this awesome link up....

New Year's Organizing Revolution: Challenge #1 - Office/Desk Area
New Year's Organizing Revolution: Challenge #1 - Office/Desk Area
Hi everyone, I am participating in this awesome link up organization challenge!
Hi everyone, I am participating in this awesome link up organization challenge!
I was so excited to start this project I forgot a lot of the before pictures, especially in the drawers. I also forgot to read the tutorial on how to take nice photos but I'm hoping the ones I got get the point across.
I added some additional goals for myself,
1. I can't buy anything new, I can only reorganize and re purpose with things I already have.
2. Poke as few holes in the wall as possible because we don't own this house and I'll have to fill every hole I make.
3. Everything should be movable and easy to reset up at our next home (we are moving in 4 months).
Here is a picture of my side of the office (desk, drawers & wall). The project on the table is not normally there, however the boxes underneath the table are building up, the random things collecting on the stack of drawers needs help, and the randomness on the wall needs to go.

After :-)
Now I actually want to work in the office!
I put away the random things collecting on top of the stack of drawers. Took down my randomly placed notes and pictures putting them in scrapbooks and in their place hung one of my chicken wire displays. I removed the boxes of completed craft from under the table so they are no longer in my foot space. I hung the year around items that are listed on my etsy shop on the chicken wire, and boxed up the holiday crafts for next year.

Now for the mess that was inside those drawers. On top of the drawers was a blue box and white box. Inside was scrap booking paper.

The blue box is now gone and the white one has page protectors, spacers, and extensions. The colored drawers are now organized by type of paper, and are labeled. I added the labels because I like this arrangement and want to put everything back in its place after the move.

I forgot the before picture on this on, but this was my sticker box. It was a mess, the stickers always moves around, they were organized by size not theme and it needed several rubber bands to keep it all together.

This file folder was in the yard sale pile, it's not going anywhere now! I love it's new purpose :-)

This drawer was catch all for scraps. I save small scraps of scrapbook paper to make tags can cards. I also save scraps from cricut cutouts to use as stencils. Overtime it was just too much of a pain to dig through.

This is another file folder from the yard sale pile, it is now home to scraps all organized by color.

The stickers and scraps in their new home.

Back to the scrap drawer...

It is now how to stencils, patterns and letter

All of which are now organized

This was my painting tub. It was too small, the lid would no longer close.

I moved the paints into a drawer, not only did everything fit, but I also added new paints I got for Christmas.

The tub works great for keep the bottles in place too.

All of this stuff was already in this drawer (I forgot the before). All of the pens were in the original containers which meant everything was a different size, and everything kept falling over. Plus the note pads kept getting jumbled up in the boxes. I saw this idea for organizing with cans on pinterest, here is the link
they used tuna cans but soup cans worked great for pens and scissors

This drawer was just full of random stuff (again forgot the before) it now has all my glue, and tape. These Items were all in a pile in a shoe box. Now anything thing can be used without everything else falling over.

Everything in it's place

Some of the stuff in the drawers were projects I'm still working on, I used bags to keep the stacks organized and moved them to a works in progress box out of the way.

I am so glad I decided to do this challenge, now my office is ready for the new year!
Subscribe to:
Comments (Atom)